

Tesla Model Y Charging at Home Philippines: Complete Step-by-Step Setup Guide
- JSD EV Specialist

- Jun 12
- 7 min read

What You Need to Know Before You Start
Home charging for a Tesla Model Y in the Philippines is simpler than you think—but there are real decisions to make. The difference between a ₱30K setup and a ₱120K installation comes down to your home, your situation, and your goals.
Here's the reality: You have three main charging paths:
Level 1 (120V household outlet): Painfully slow (~2–5 km/hour). Only for true emergencies.
Level 2 with portable charger (220V outlet): ~20–30 km/hour. Charges full battery overnight. ₱30K–50K upfront.
Level 2 with wallbox (permanent installation): Same speed as above, but hardwired into home. ₱80K–150K total cost.
For 99% of Model Y owners in the Philippines, Level 2 is the answer. It's fast enough for daily driving, affordable enough to make financial sense, and flexible enough to work in almost any home situation.
Step 1: Assess Your Home's Charging Readiness
Before you spend a single peso, answer these questions honestly:
Do you have a dedicated parking spot? (House garage, condo reserved spot, apartment lot)
Is there a 220V outlet within 10 meters of your parking spot? (Or can one be installed?)
Do you own your home/parking space, or do you rent/lease?
Are there HOA or building restrictions on electrical work?
How often do you drive? (Daily commuter? Weekends only?)
Do you take road trips? (Affects charging strategy)
What's your budget? (₱30K vs ₱120K is a big difference)
Your answers determine your path. Let's break it down:
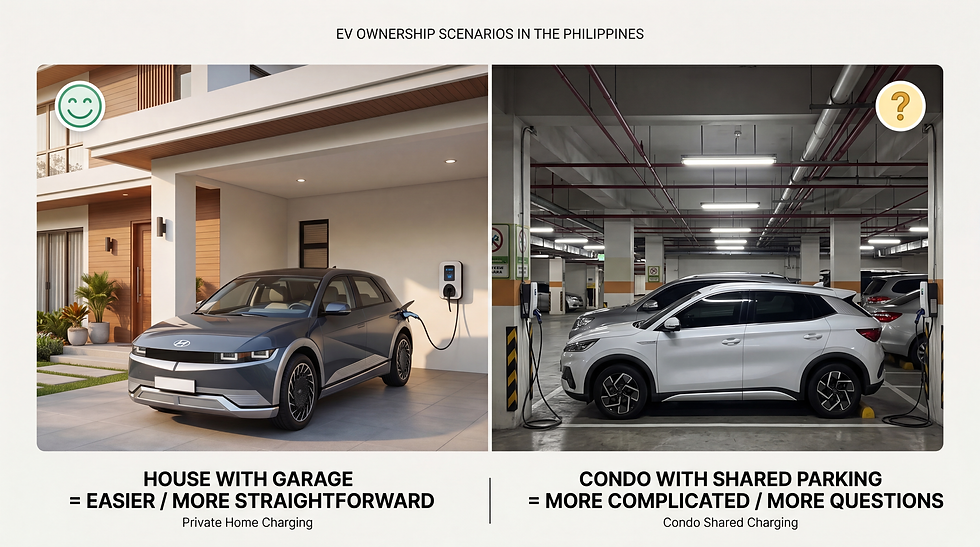
If You Own a House with a Garage
You're in the best situation. You have options: portable charger (₱30–50K), outlet installation only (₱15–25K), or full wallbox (₱80–150K). You have no HOA restrictions. Move to Step 2.
If You're in a Condo with a Reserved Parking Spot
Check your lease/deed. Can you modify the parking area? Does the HOA allow charging? If yes, you have similar options to homeowners. If no, a portable charger is your answer (₱30–50K, no approvals needed). Jump to Step 4.
If You're in an Apartment with Shared Parking
This is harder but not impossible. You'll need to negotiate with management or find a nearby 220V outlet. A portable charger becomes essential. See Step 4.
Step 2: Check Your Electrical System
Level 2 charging draws consistent current (up to 32A). Your home's electrical panel needs to handle this without overloading.
What to Check
Call a licensed electrician (₱500–1,000 consultation fee). Ask them to assess:
Main panel capacity (how much spare capacity do you have?)
Whether you need a sub-panel or panel upgrade (older homes might)
Available breaker slots (do you have space for a new circuit?)
Existing outlet type in parking area (220V 15A, 20A, or none?)
Distance from panel to parking spot (affects cable run cost)
The honest truth: Most homes built after 2010 have plenty of capacity. Older homes (pre-2000) may need a panel upgrade (₱20K–40K additional cost).
Typical Electrical Costs in Philippines
Work Type | Typical Cost | Notes |
Consultation (electrician visit) | ₱500–1,000 | 1 hour assessment |
220V outlet installation (new) | ₱8,000–15,000 | Within 5m of panel |
Cable run (per meter beyond 5m) | ₱1,500–2,500/meter | Adds up if parking is far |
Breaker + safety installation | ₱3,000–5,000 | Required for dedicated circuit |
Panel upgrade (if needed) | ₱20,000–40,000 | Older homes only |
Total (outlet + breaker, no panel upgrade) | ₱15,000–25,000 | Most common scenario |
Total (with panel upgrade) | ₱35,000–65,000 | Worst-case scenario |
Photo
Pro tip: If costs are high, consider a portable charger instead. It plugs into any existing 220V outlet and eliminates installation costs entirely.
Step 3: Choose Your Charging Equipment
This is the crucial decision: portable or fixed charger?

Option A: Portable Level 2 Charger (₱30K–50K)
A compact charger that looks like a briefcase and plugs into any 220V outlet. It comes with a 5–7 meter cable.
✓ Advantages
No installation cost
Works with any 220V outlet
Take it on road trips
No HOA approval needed
Can move it between homes
✗ Trade-offs
Cable management (store the cable safely)
Not suitable for shared parking (security)
Requires outlet near parking spot
Best for: Condo/apartment owners, people who move frequently, budget-conscious buyers.
Option B: Fixed Level 2 Wallbox (₱50K–150K total)
A permanent charger hardwired into your electrical system. Installation includes outlet + breaker + charger unit.
✓ Advantages
Professional, permanent setup
No cable to manage nightly
Looks clean & installed
Smart features (app control, scheduling)
Future-proof for resale
✗ Trade-offs
₱35K–65K installation cost
Requires HOA approval (often denied)
Can't move it; tied to that location
Longer setup timeline (2–4 weeks)
Best for: Homeowners with permanent garage, willing to invest in long-term solution, want "set and forget" charging.
The Real Recommendation
For the Philippines market in 2026, portable Level 2 is the smarter choice for most people.
Here's why:
Costs ₱30K–50K total (vs ₱80K–150K for wallbox + installation)
Works with any 220V outlet (most homes have at least one in garage/parking area)
No HOA approval needed
You own it; take it if you move
Charging speed is identical to wallbox (20–30 km/hour)
The only reason to choose a wallbox: if you're a homeowner who plans to stay 10+ years and value aesthetics over flexibility.
Step 4: Installation & Setup (If Going Portable)
This is the easiest path. A portable charger requires no installation—just unbox, read the manual, and plug in. But let's walk through the checklist:
Verify your outlet is properly grounded.
This is critical. Improper grounding is a fire/electrocution risk. Use a multimeter or call your electrician to confirm. If your existing outlet is not grounded, have an electrician fix it (₱3,000–8,000). Don't skip this.
Clear the parking area.
Remove obstacles around your parking spot. You'll be running a 5–7 meter cable from the outlet to your Model Y's charging port. Plan the cable route (safe, not blocking traffic, protected from stepping on it).
Unbox and inspect the charger.
Check for damage in transit. Inspect the cable (no cuts, fraying, exposed wires). Plug the charger into the outlet—most chargers have indicator lights. Green = ready to use.
Read the manual (5 minutes).
Seriously. Different chargers have different features. Learn how to use the control panel, app (if included), and safety features.
Locate your Model Y's charging port.
It's on the rear driver's side. Press the charging door (it springs open). Examine the connector—it's a Type 2 standard connector that fits any Level 2 charger globally.
Connect the charger to your Model Y.
Insert the Type 2 connector into your Model Y's charging port. You'll hear a click. The charger should recognize the vehicle and begin charging. Your Model Y's infotainment screen will confirm charging status.
Check your charging settings in the car.
Go to Controls > Charging. Set your charging limit (typically 80% for daily driving; 100% only for long trips). This preserves battery health.
First charge test.
Leave it charging for 2–3 hours. Verify the cable isn't getting hot. Check that amperage and voltage match your charger specs (usually 32A, 220V). No excessive noise or burning smell = you're good.
Set up a charging routine.
Best practice: plug in after you arrive home (early evening). Charge overnight to 80%. Wake up with a full battery. Repeat daily. This routine means you almost never need a public charger for daily commutes.
Plan cable management.
Buy cable organizers or a portable reel stand. Keep the cable neatly coiled when not in use. Prevents damage, tripping hazards, and theft.
Step 5: Installation & Setup (If Going Wallbox)
If you've decided on a permanent installation, here's the process:
Get multiple electrician quotes.
Contact 3 licensed electricians with EV experience. Ask for quotes including: outlet installation, breaker box setup, charger unit, labor, and permits (if required). Range is typically ₱80K–150K.
Check for building permits.
In some areas, permanent electrical work requires permits from the city/barangay. Good electricians handle this. Bad ones skip it (avoid these). Permits are ₱2K–5K but protect you legally.
Schedule the installation.
Most installations take 1–2 days. The electrician will: run cable from the panel to your parking spot, install a dedicated 32A breaker, mount the charger unit, and test everything. Your home's power may be cut off briefly.
Choose your charger unit.
Brands: Tesla Wall Connector (if available locally), ABB, Wallbox, Siemens, or local brands. Compare features: App control? Scheduling? Load balancing? Cost range: ₱20K–50K for the unit itself.
Test after installation.
The electrician should test voltage, amperage, and grounding. You should verify charging with your Model Y. Get a certificate of completion for your records.
Set up smart features (if your charger has them).
Download the charger's app (if available). Enable scheduling to charge during off-peak Meralco hours (9 PM–5 AM). This can save ₱500–1,000/month.
Safety & Electrical Best Practices

Other Safety Tips
Use dedicated circuits: Don't share the outlet with high-demand appliances (AC, dryer, water heater). A dedicated breaker prevents tripping.
Weatherproof the connection: Even if the outlet is under a garage overhang, use a weatherproof connector to protect against humidity and monsoon rains.
Cable management: Never use extension cords with EV chargers. Never crimp or compress the cable. Never leave it in water or excessive heat.
Ventilation: Ensure your parking area has adequate airflow. EV chargers generate minimal heat, but good ventilation is a standard safety practice.
Childproofing: If you have young children, ensure the charger and cable are out of reach.
Professional maintenance: If you notice burning smells, excessive heat, sparks, or unusual sounds from the charger, stop using it immediately and call your electrician.
Step 6: Optimize Your Charging Routine
Now that your charger is installed, let's maximize your savings and battery health:
Daily Charging Strategy
Charge to 80%, not 100%: Daily charging to 100% stresses the battery slightly. 80% is the sweet spot: you get 480–560 km of range (more than enough for daily driving), and your battery stays healthier longer.
Plug in daily: Don't let your battery drop below 20%. Keep it topped up. Even if you only drove 30 km that day, plug in anyway.
Charge during off-peak hours: Meralco off-peak rates (typically 9 PM–5 AM) are ₱2–4/kWh cheaper than peak hours. Use your charger's scheduling feature to charge overnight.
Temperature matters: Cold charging (below 0°C) and hot charging (above 40°C) slightly stress batteries. Philippines heat is high, but AC-cooled charging helps. Try to charge in early morning or late night when it's cooler.
Maximizing Your Electricity Savings
Here's the real money saver: Home charging at ₱12/kWh vs. public chargers at ₱28/kWh saves you ₱16/kWh. For daily 50 km driving (5 kWh charging), that's ₱80/day savings—₱2,400/month.
What If Home Charging Isn't an Option?
Some people genuinely can't install home charging (apartment with no outlet access, frequent relocations, renting without landlord cooperation). If that's you:
Use a combination strategy: Home charging when possible + public chargers for road trips
Negotiate with building management: Many allow portable chargers if framed as "appliance" not "installation"
Explore a portable charger: Even without a dedicated outlet, you can plug into a living room outlet temporarily (slower, but works)
Consider this before buying: If you can't home charge, a Tesla Model Y becomes less financially attractive. A BYD plug-in hybrid (charges faster, has gas backup) might be smarter


Comments